

I recently upgraded my front components and now wanted a little more bass. Nothing too crazy, just wanted something better than stock.
After installing the front components, I decided to run a small subwoofer to enhance the bass response. However, I didn't want to lose any trunk space or have to relocate the scissor jack. I searched online and see if I there are other solutions, I came across lots of spare tire builds! I figured I'd give it a try. The only thing with spare tire builds is that we require a shallow mount sub due to the space saver spare tire. If you have a full size, go nuts! =)
Materials:
Pioneer TS-SW2501S4 10" shallow mount subwoofer - 3" mounting depth required!
1 Gallon 3M/Bondo Fibreglass Resin
2 x packages of 3M Fibreglass Mat (8 square feet per package)
Liquid Hardener
2' x 2' 3/4" thick MDF
2' x 4' 1/2" thick MDF
Shorter spare tire retaining bolt (M10-1.25 x 30mm)
Brushes, rape, rulers, drills, etc.
Step 1.
Tape off the rim.
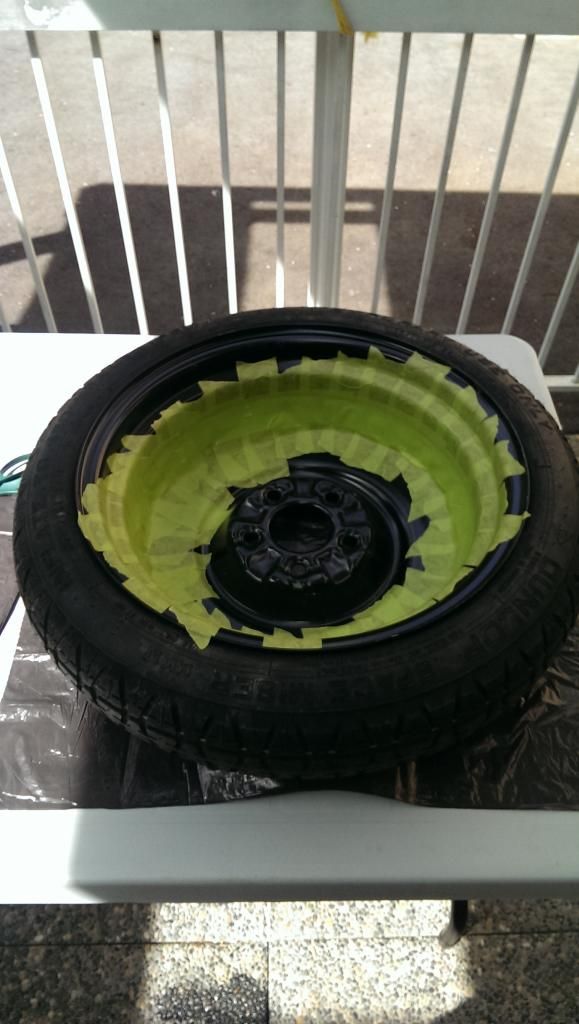
Step 2.
Line with garbage bags and ensure there are no spaces for resin to leak.
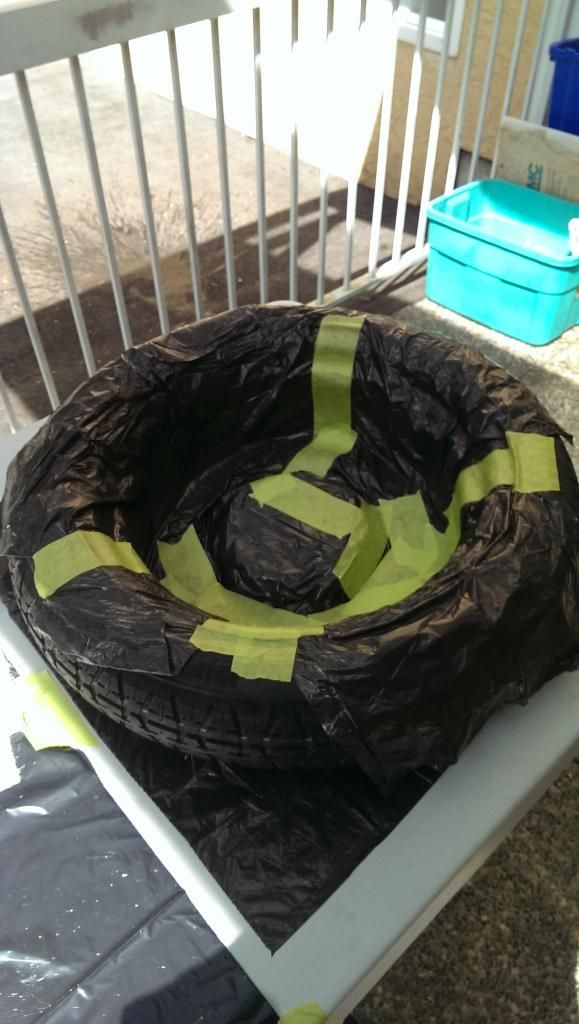
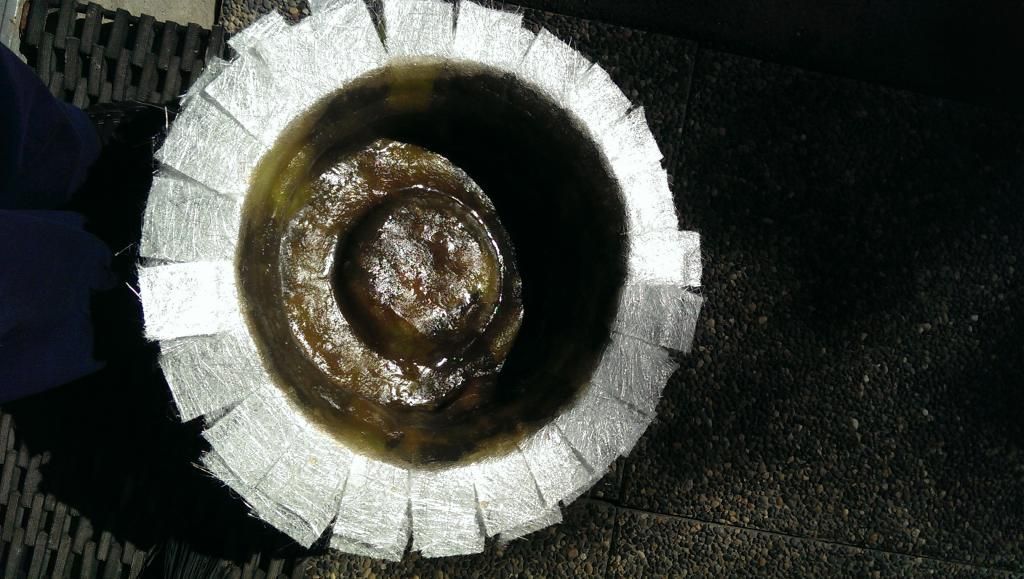
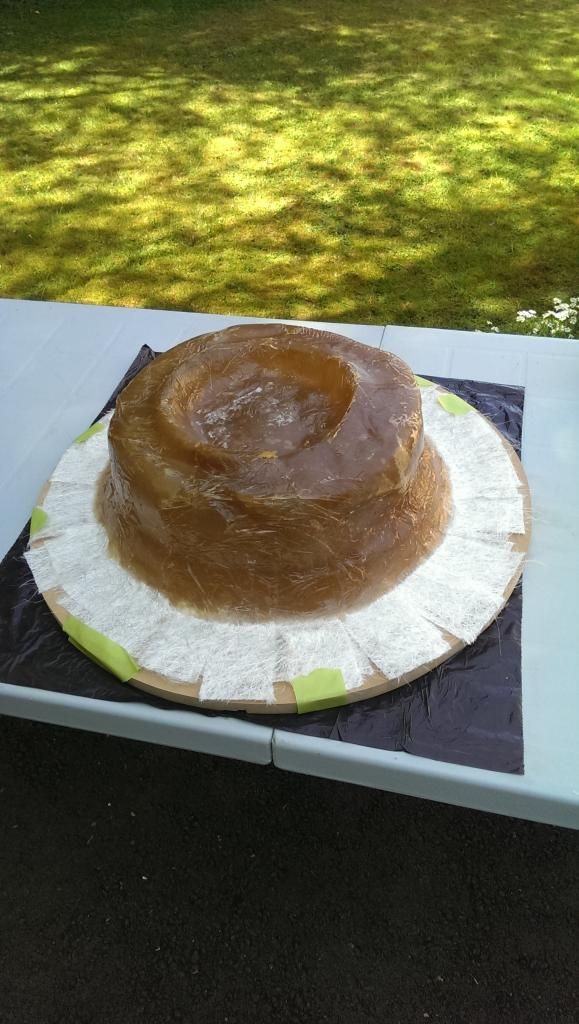
Step 3.
Cut your fibreglass mat into workable pieces 3" x 2" is perfect. Follow the instructions on the resin.
The past few days were crazy warm, the resin was hardening really quickly. To counter act this, I mixed smaller amounts of resin (~4oz) and used a little less hardener.
Start laying the fibreglass, it's pretty simple. Start by going around the rim in one layer, then by the time you get around, the first piece you laid should have hardened. Start layer 2. Then repeat until you hit 3 layers. (overlap each piece of fibreglass by 1/2" or so, this ensures structural rigidity)
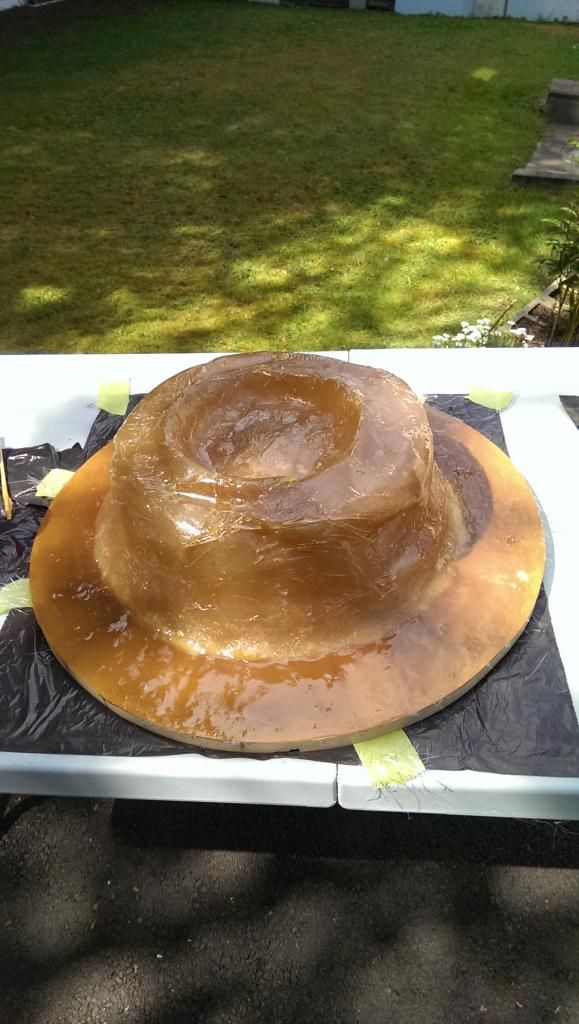
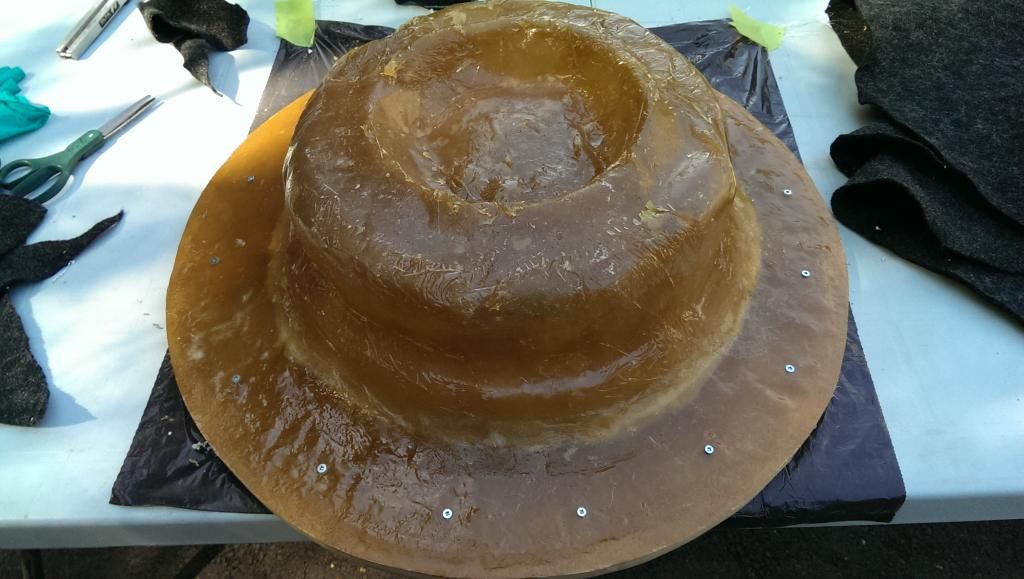
Step 4.
Pull the mould. If you lined your rim correctly, you should have no issues with this!
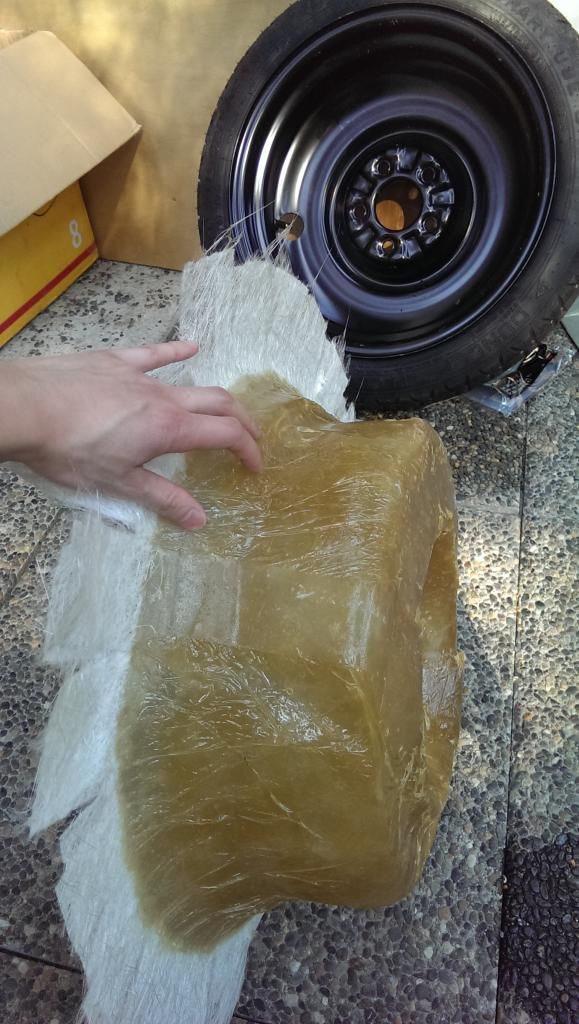
Step 5.
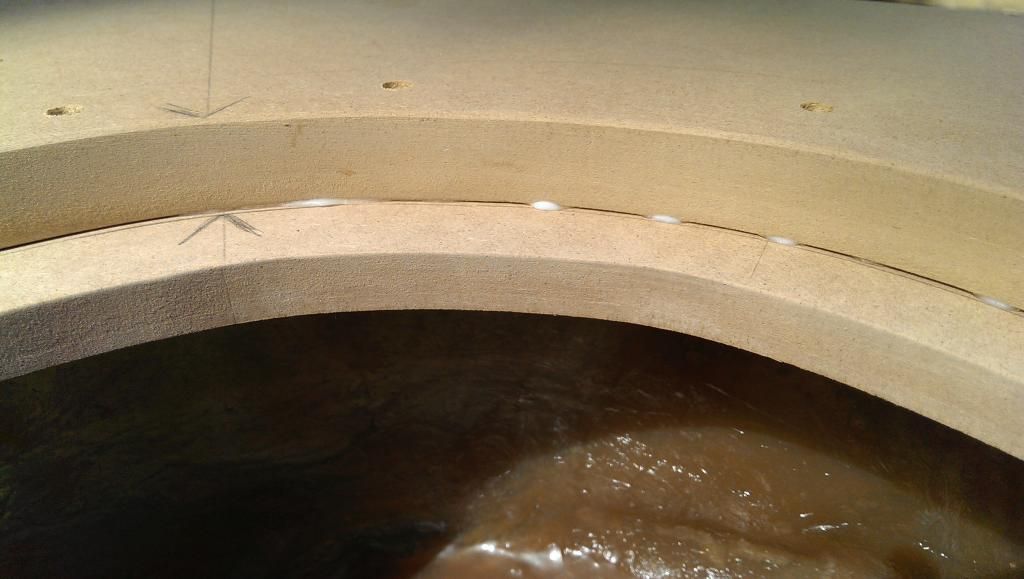
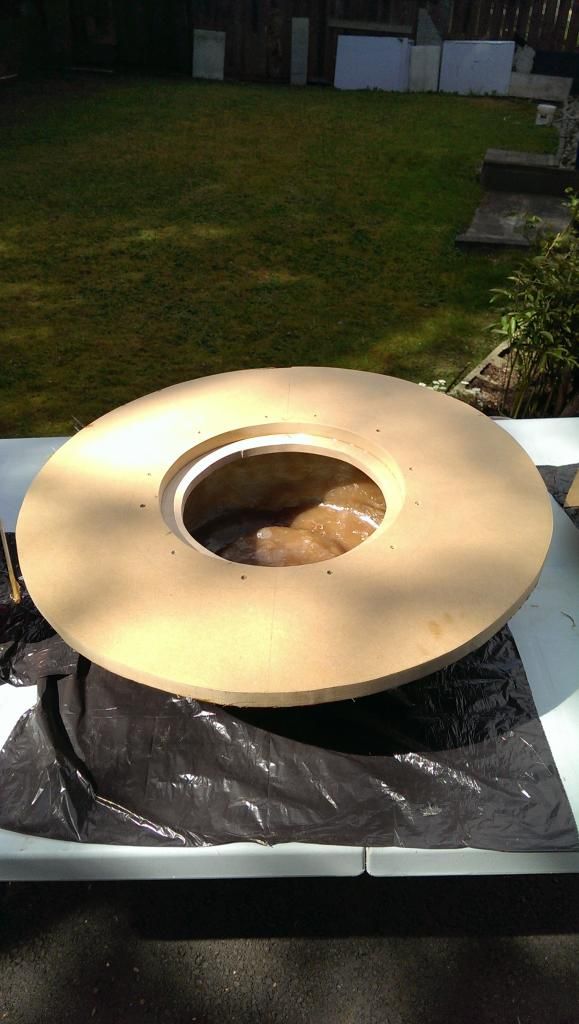
Start measuring and cutting MDF. I wanted the MDF to completely hide the wheel (wheel + tire diameter = 23"). I also wanted to recess the sub so that it would sit flush.
The flush mounting depth required 3/4", PERFECT. So I took the 3/4" MDF, marked the absolute middle of the board by drawing lines from corner to corner. Where they intersect = middle. I didn't have a large ruler so I used a piece of scrap metal, measured out 12.5" radius and drew the circle.
Step 6.
I used a jigsaw to cut the mdf.
Step 7.
Then measured the cutout for the subwoofer. The outer diameter of sub was 11 3/8". Cut out this circle with jigsaw as well.
Step 8.
I forgot to take pictures for this, but remember how I said I wanted to flush mount the sub? Question was, how was I suppose to mount the sub under the 3/4" MDF? Enter the 1/2" MDF!
I cut out a smaller section, but larger than the hole in the 3/4" MDF. I then cut the mounting circle 9" diameter for the subwoofer.
I would then mount the 1/2" piece underneath the 3/4" piece and voila, flush mounted! =)
Step 9.
Forgot to take pictures of this step as well cuz I was too excited...haha
Join the 1/2" MDF with the 3/4" MDF, make sure the circle cutouts are in line with the sub to ensure it will fit!
I used Lepage No More Nails all purpose glue.
See how the sub is able to be recessed now?
Step 10.
To ensure the two MDF pieces were held together, I also used 12 x 1-1/2" wood screws that I counter sunk.
Step 11.
Grab the fibreglass mould and put it on underside of MDF piece.
Step 12.
Start laying the resin for uncured fibreglass! The resin sticks really well to MDF believe it or not.
Step 13.
I was worried that the bass may possibly separate the fibreglass layer from the MDF, so I used 20 x 3/8" screws from underside to hold MDF and fibreglass together.
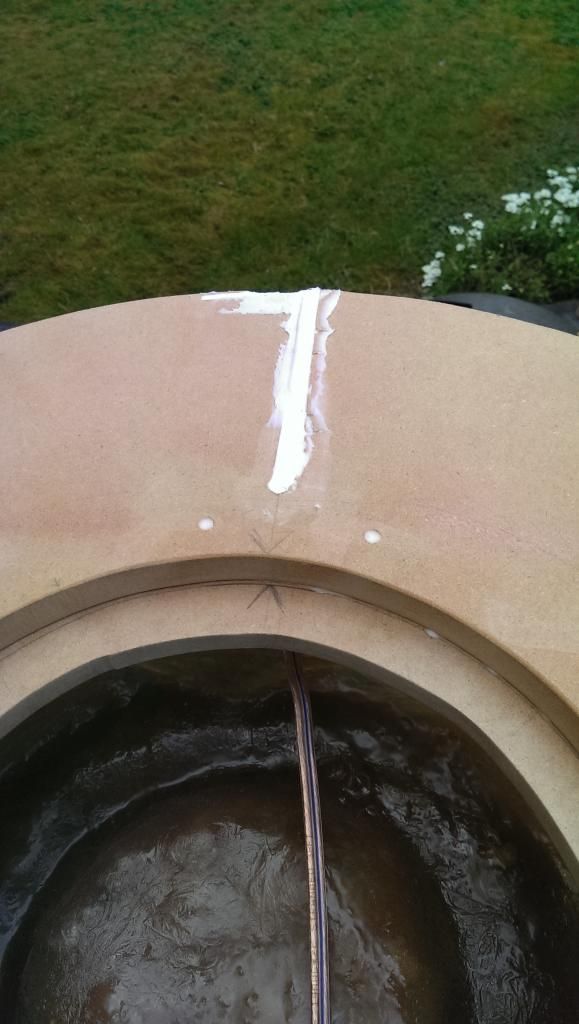
Step 14.
In order for me to wire up the sub, I had to figure out a way to get the wire inside the mould without using those terminal things.
I decided to drill a 1/2" hole in through the MDF, then routed a channel deep enough for the wire so that it exited from the rear. I then filled in the hole and channel with the all purpose glue.
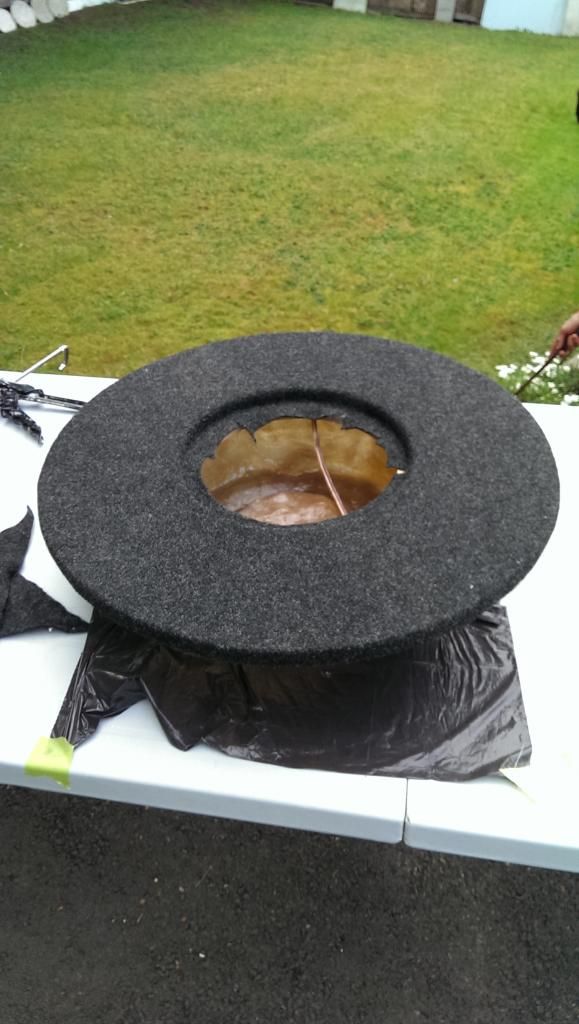
Step 15.
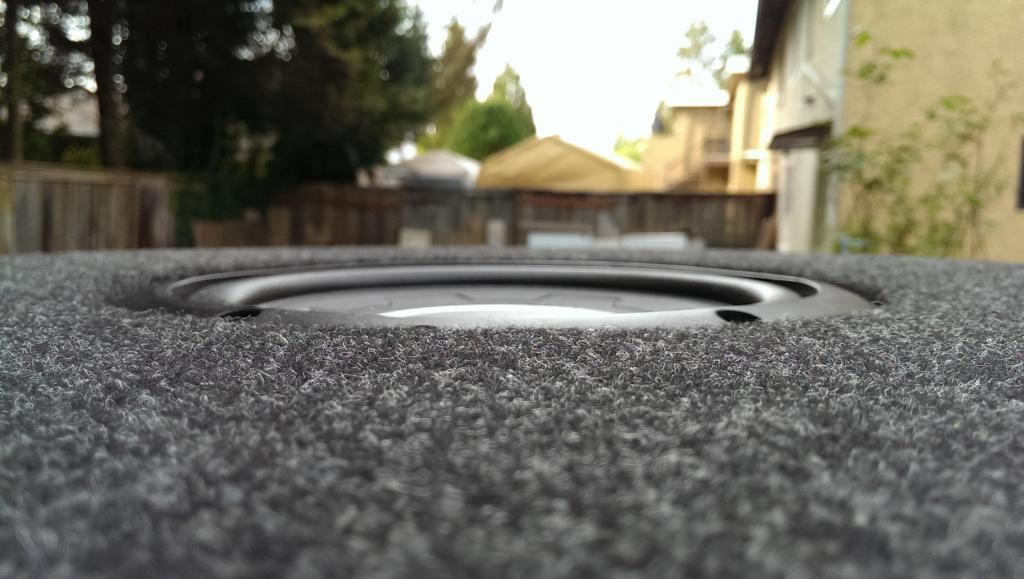
Lay the carpet and cut out center for the recessed sub.
Step 16.
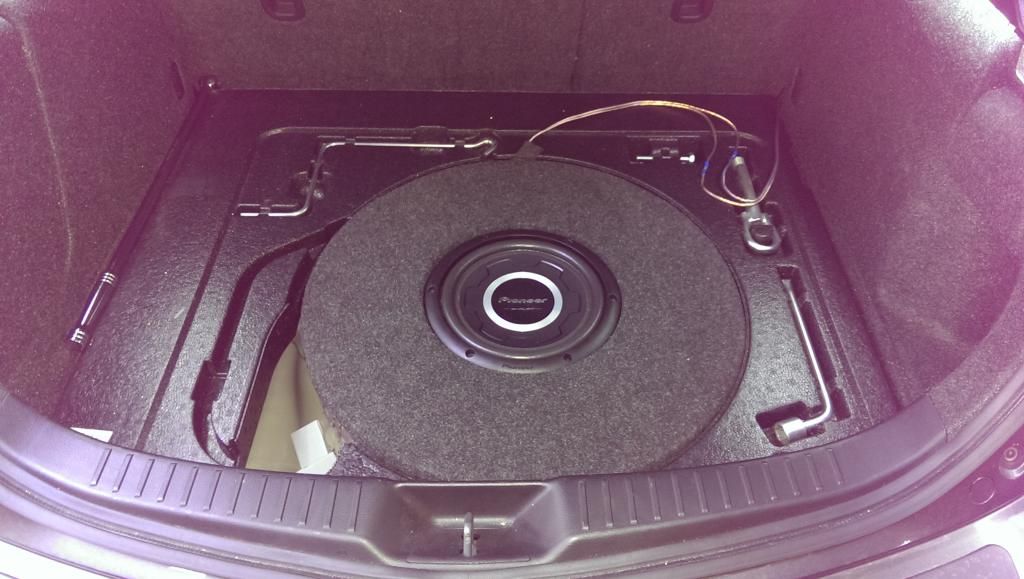
Wire and mount the sub.
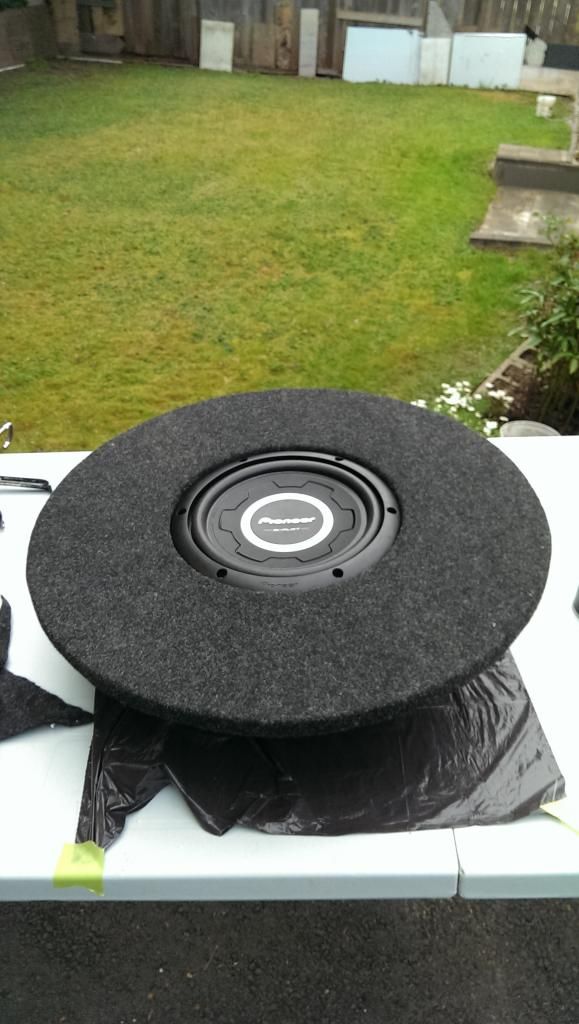
Sub actually sits more sunk when I screwed down the sub. Picture below is without screws installed.
Step 17.
Put the wheel and enclosure back in. Wire up the sub to your amp. Then BOOM BOOM.
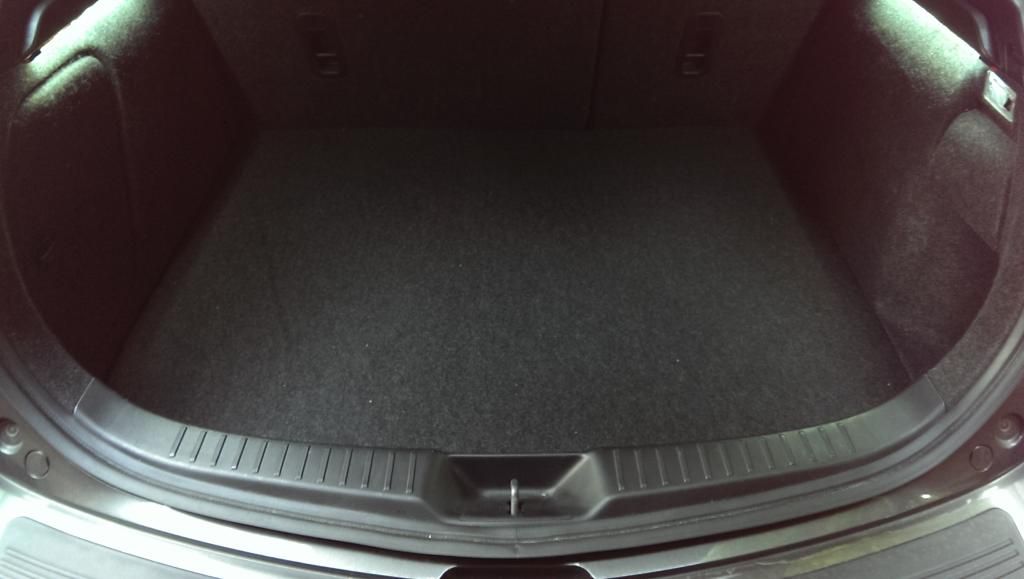
I did not lose any trunk space height with this install. Most installs I've seen online, the user has lose about 1/2" - 3/4" in height. They also needed to build a false floor.
Here, I'm able to use stock trunk mat, luckily, our stock trunk mat has a reinforced 1/4" thick plastic underneath. I'm hoping this piece is strong enough to hold whatever cargo I have. Don't want it hitting the sub that's for sure.
Step 18.
STEALTH
Let me know what you guys think. All comments and questions are welcome! =)
After installing the front components, I decided to run a small subwoofer to enhance the bass response. However, I didn't want to lose any trunk space or have to relocate the scissor jack. I searched online and see if I there are other solutions, I came across lots of spare tire builds! I figured I'd give it a try. The only thing with spare tire builds is that we require a shallow mount sub due to the space saver spare tire. If you have a full size, go nuts! =)
Materials:
Pioneer TS-SW2501S4 10" shallow mount subwoofer - 3" mounting depth required!
1 Gallon 3M/Bondo Fibreglass Resin
2 x packages of 3M Fibreglass Mat (8 square feet per package)
Liquid Hardener
2' x 2' 3/4" thick MDF
2' x 4' 1/2" thick MDF
Shorter spare tire retaining bolt (M10-1.25 x 30mm)
Brushes, rape, rulers, drills, etc.
Step 1.
Tape off the rim.

Step 2.
Line with garbage bags and ensure there are no spaces for resin to leak.

Step 3.
Cut your fibreglass mat into workable pieces 3" x 2" is perfect. Follow the instructions on the resin.
The past few days were crazy warm, the resin was hardening really quickly. To counter act this, I mixed smaller amounts of resin (~4oz) and used a little less hardener.
Start laying the fibreglass, it's pretty simple. Start by going around the rim in one layer, then by the time you get around, the first piece you laid should have hardened. Start layer 2. Then repeat until you hit 3 layers. (overlap each piece of fibreglass by 1/2" or so, this ensures structural rigidity)

Step 4.
Pull the mould. If you lined your rim correctly, you should have no issues with this!

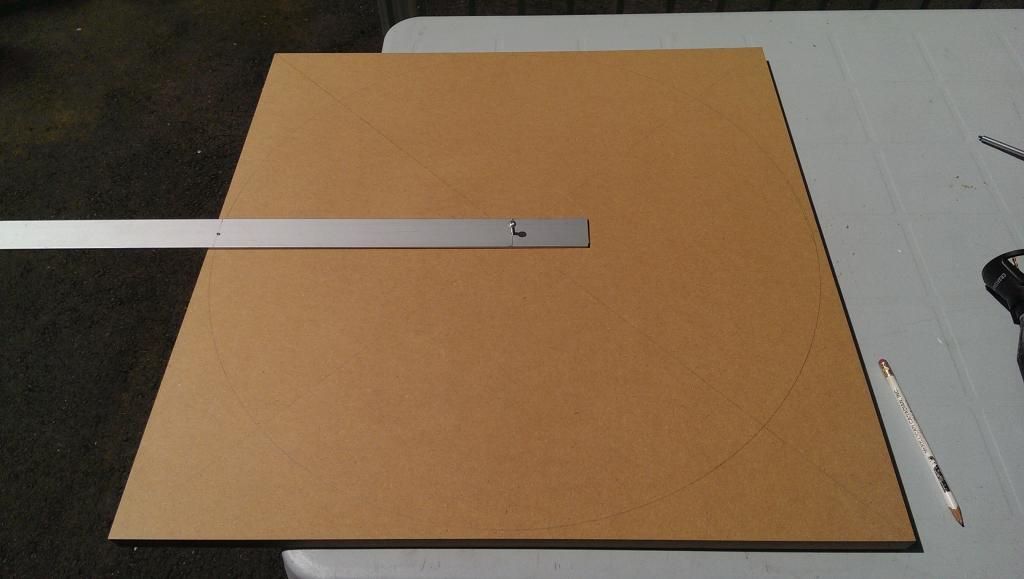
Step 5.
Start measuring and cutting MDF. I wanted the MDF to completely hide the wheel (wheel + tire diameter = 23"). I also wanted to recess the sub so that it would sit flush.
The flush mounting depth required 3/4", PERFECT. So I took the 3/4" MDF, marked the absolute middle of the board by drawing lines from corner to corner. Where they intersect = middle. I didn't have a large ruler so I used a piece of scrap metal, measured out 12.5" radius and drew the circle.

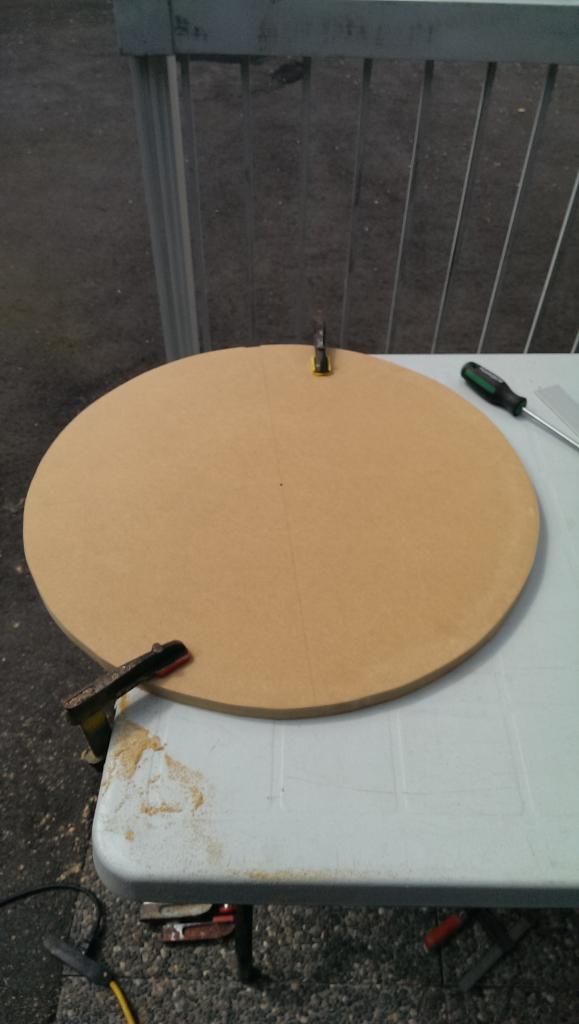
Step 6.
I used a jigsaw to cut the mdf.

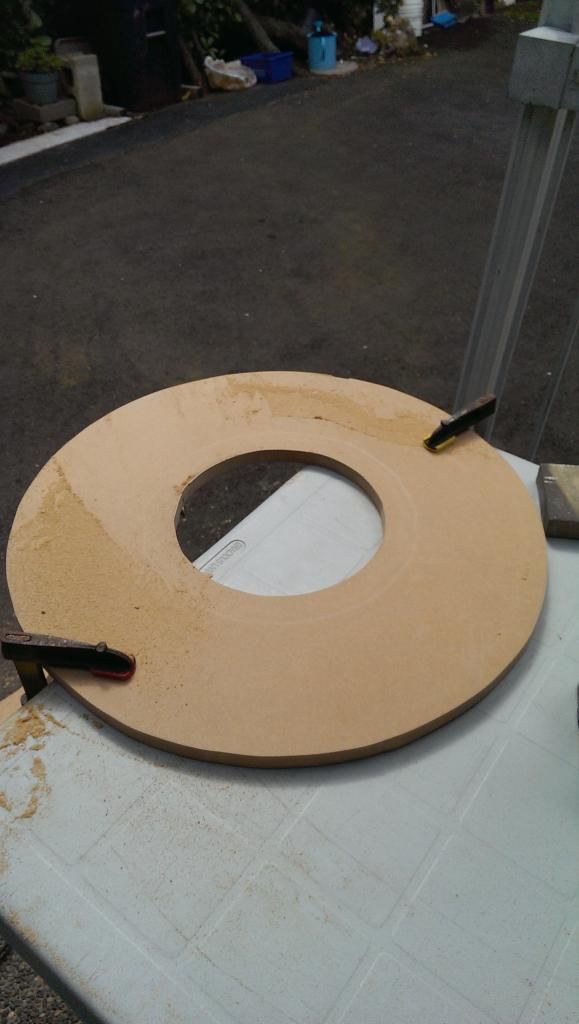
Step 7.
Then measured the cutout for the subwoofer. The outer diameter of sub was 11 3/8". Cut out this circle with jigsaw as well.

Step 8.
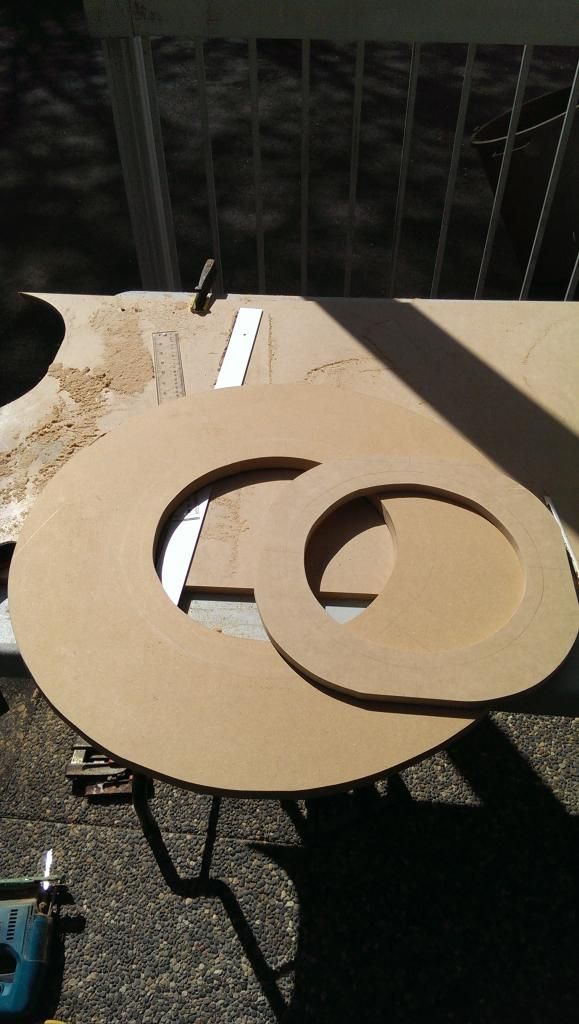
I forgot to take pictures for this, but remember how I said I wanted to flush mount the sub? Question was, how was I suppose to mount the sub under the 3/4" MDF? Enter the 1/2" MDF!
I cut out a smaller section, but larger than the hole in the 3/4" MDF. I then cut the mounting circle 9" diameter for the subwoofer.
I would then mount the 1/2" piece underneath the 3/4" piece and voila, flush mounted! =)

Step 9.
Forgot to take pictures of this step as well cuz I was too excited...haha
Join the 1/2" MDF with the 3/4" MDF, make sure the circle cutouts are in line with the sub to ensure it will fit!
I used Lepage No More Nails all purpose glue.
See how the sub is able to be recessed now?

Step 10.
To ensure the two MDF pieces were held together, I also used 12 x 1-1/2" wood screws that I counter sunk.

Step 11.
Grab the fibreglass mould and put it on underside of MDF piece.

Step 12.
Start laying the resin for uncured fibreglass! The resin sticks really well to MDF believe it or not.

Step 13.
I was worried that the bass may possibly separate the fibreglass layer from the MDF, so I used 20 x 3/8" screws from underside to hold MDF and fibreglass together.

Step 14.
In order for me to wire up the sub, I had to figure out a way to get the wire inside the mould without using those terminal things.
I decided to drill a 1/2" hole in through the MDF, then routed a channel deep enough for the wire so that it exited from the rear. I then filled in the hole and channel with the all purpose glue.

Step 15.
Lay the carpet and cut out center for the recessed sub.

Step 16.
Wire and mount the sub.

Sub actually sits more sunk when I screwed down the sub. Picture below is without screws installed.

Step 17.
Put the wheel and enclosure back in. Wire up the sub to your amp. Then BOOM BOOM.
I did not lose any trunk space height with this install. Most installs I've seen online, the user has lose about 1/2" - 3/4" in height. They also needed to build a false floor.
Here, I'm able to use stock trunk mat, luckily, our stock trunk mat has a reinforced 1/4" thick plastic underneath. I'm hoping this piece is strong enough to hold whatever cargo I have. Don't want it hitting the sub that's for sure.

Step 18.
STEALTH

Let me know what you guys think. All comments and questions are welcome! =)
")


